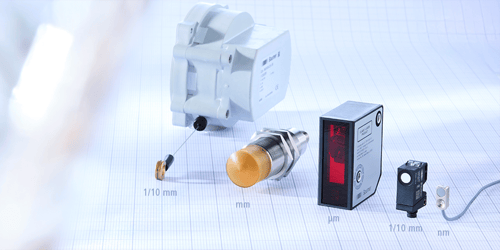
Optical precision to the nanometre
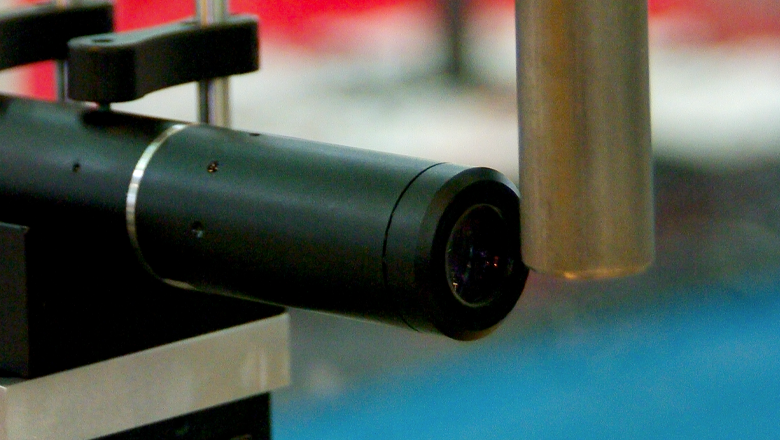
In its search for extremely accurate measuring methods (nanometre), Sentech came across chromatic confocal sensors. The sensor integrator from Brabant now works with the French inventors who are in the middle of their next growth phase. A handful of Dutch companies are already applying the contactless technology.
If engineers want to perform accurate, contactless distance measurements, they have a toolbox full of tools at their disposal. They can choose from a considerable number of options, even in the micrometre range.
Thin arsenal for extreme precision technology
But if it needs to be even more precise and accurate – identifying details from a sub-micron to a few nanometres in size – then the range of measurement tools is soon depleted. Laser triangulation was the usual choice in the past but, as with all methods, this technology also has its limitations.
In terms of resolution, for example, you only approach the sub-micron level if you combine thousands of data points, some sampling points are unreachable because of shadow effects and distortions occur regularly, caused by the laser bundle’s speckle pattern.
Sentech has also encountered the shortcomings of laser triangulation.
At the source of chromatic confocal
For a customer in the semiconductor industry the measuring technology did not achieve the desired accuracy. Peter Verstappen, account manager at the sensor specialist, went looking for an alternative and came across chromatic confocal imaging.
‘In order to provide the best fit for our customers, Sentech is happy to do business with the source of the technology,’ says Verstappen. In this case, that is the French company Stil. This company located in Aix-en-Provence was established by three PhD graduates who developed the technology in the mid 1990s at the Paris Institut d’Optique.
Verstappen approached Stil soon after the French developers brought their technology from the traditional lab environment into industry and started to expand their network of partners.
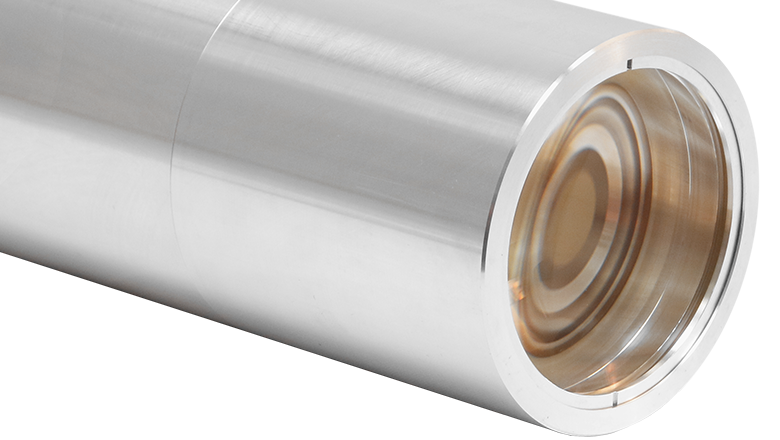
In an optimal setting, the Silent sensor achieves a resolution of 7 nanometers with a single measurement.
Standard and customer-specific
Because the patent has since expired, larger players have also jumped on the bandwagon. Companies such as Micro-Epsilon and Omron now also offer chromatic confocal sensors in their ranges. Stil does not have the marketing capacity to compete with them directly.
As Verstappen relates, ‘Large international suppliers focus on a selection of the possibilities in order to offer them in standard products. Stil knows the technology like no other and certainly knows its applications. In addition to a standard portfolio, it can also provide customer-specific applications because it focuses on high mix, low volume.’
Nanotechnology as a rainbow
Stil’s technology consists of two parts: confocal and chromatism. Confocal microscopy is a method that was already invented in the 1950s by the American Marvin Minsky. With such an instrument you can very accurately depict a single point of your sample.
You do that by focusing a light source via a pinhole – for example, a mask with a minuscule hole – and a series of lenses on your sample. The bundle is reflected on a boundary between two layers with a different refractive index.
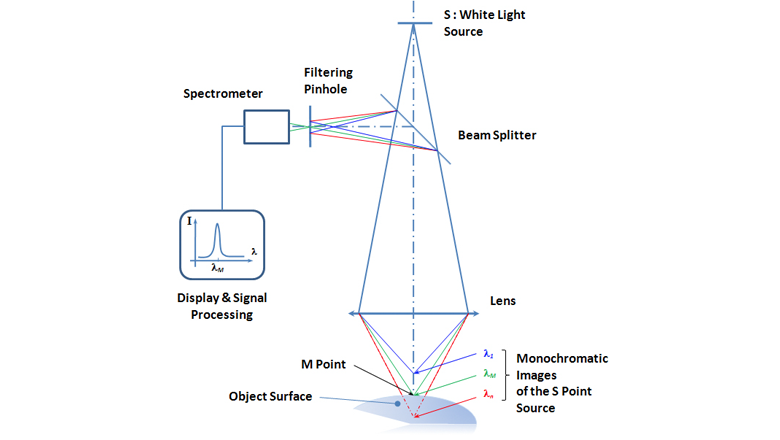
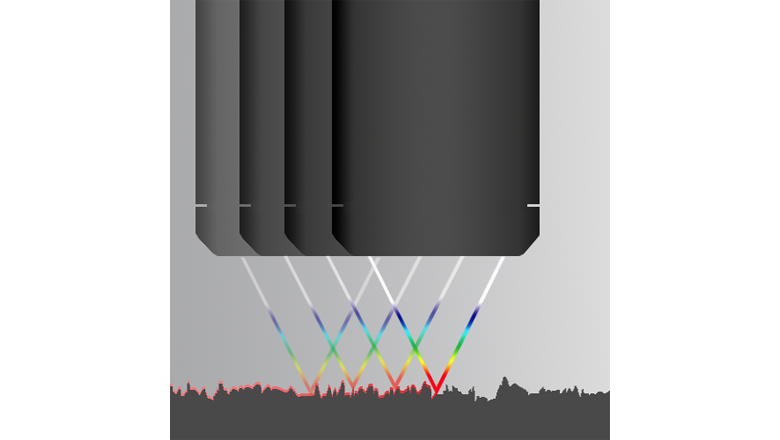
Because each wavelength has its own focus point, the color the sensor detects is a very precise measurement of the distance to the reflection surface.
The reflected light travels via the lenses and a beam splitter to a detector, in front of which is also a pinhole. The trick is that everything in the sample which is not in focus is also not displayed on the detector.
These reflected beams fall onto the beam splitter at a different angle and do not pass through the tiny hole.
7 nanometer resolution
‘The detector can only see something that is in perfect focus,’ explains Matthieu Desjacques, senior sales engineer at Stil. ‘The pinhole blocks all other reflections, whether they are to the left or right, higher or lower. The technology therefore provides a sharp focus area for a single point. In every possible environment.’
Then there is the chromatic side. How a lens focuses light depends on the wavelength. When using a positive lens, red light is the least refracted. Thus, the focal point lies too far from the lens. Violet light is, however, strongly deflected and has its focal point closer to the lens. If you shine a light source that contains a broad spectrum of wavelengths on such a lens, a rainbow of focal points develops.
Stil combines this light property with the existing confocal microscopy. Because each wavelength has its own focal point, the colour that the sensor receives is a very precise measurement of the distance to the reflective surface.
After all, there is only one wavelength in which the focal point exactly coincides with that point. The result of a scan over a surface is a colour-coded micro-topography. The more red there is, the greater the distance.
‘The spectrometer behind the pinhole must decode this information,’ explains Desjacques. ‘With a perfect point, you should see a Dirac function. In practice, however, that is not feasible. The pinhole in front of the source has a very small diameter, which means that the minimum spot size is approximately 1.8 microns by default. This produces a Gaussian curve. We can get the required information from the peak wavelength.’

Matthieu Desjacques knows everything about ‘Chromatic Confocal sensors for non-destructive measurement and inspection in nanometric scales’.
In an optimal setting, the Stil sensor can achieve a resolution of 7 nanometres with a single measurement. You can only see these details if the optical pen with the sensor is fixed in relation to the sample.
Desjacques: ‘You can build a mechanical construction to allow the sensor to move, enabling you to measure at multiple points. You can also achieve very high accuracy with optical encoders, but you no longer obtain that maximum resolution. Incidentally, that is also not always necessary. With measurements in the glass industry, for example, an accuracy of 0.05 millimetres is sufficient. It just depends on what the customer is looking for. We also supply multi-point solutions with multiple pinholes, enabling you to measure a line or a field.’
Accuracy and precision in the sub micron range
Stil often uses a white light source with wavelengths ranging from 350 to 660 nm, roughly the visible part of the spectrum. Depending on the optics chosen, the measurement range – the difference between the minimum and maximum refraction of light – runs from a hundred micrometres to a hundred millimetres.
So, it is more than sufficient for the sub-micron details you wish to measure. ‘It is also possible to select a different source,’ Desjacques stresses. ‘In the semiconductor industry, it is sometimes necessary to work with infrared light.’
An advantage of chromatic confocal imaging compared to laser triangulation is the lack of shadow effects. The system is co-axial, after all, so an angle can always be found where there is no blockage.
‘If the bundle falls on a sloped surface, a reflection cone develops which doesn’t entirely return to the block of lenses. However, the acceptance angle of the optical pen is so large that a part will always be absorbed,’ explains Desjacques.
‘At an acceptance angle of 0.7 NA, you can measure sloped surfaces up to 45 degrees. At least, if the material reflects perfectly. If it doesn’t, there is a greater chance of photon absorption and the angle of slope can become even greater.’
Edge screens
But there are plenty of situations in which the reflection cone is too far from the perpendicular. Just think of the curved Edge screens of some smartphones. If you want to measure their roughness, that is no longer possible with just a single sensor.
Stil solves this by using multiple optical pens which are positioned at an angle to each other. If you lay transparent objects, such as a glass plate, under the Stil sensor, the spectrometer registers two peaks, one for each crossing.
‘You are then able to not only very accurately measure the thickness,’ Desjacques asserts, ‘but you even get the micro-topography of both surfaces. So, you can see whether there is a potential problem with one of the boundary surfaces. This is very useful information, also for coatings in the semicon industry. Our system provides this data for a maximum of ten layers.’
Vacuum measurement
Chromatic confocal sensors have many uses, such as determining dimensions, measuring distance and thickness, mapping roughness and analysing microscopic waves on a wafer surface.
‘Four out of five users of our contactless technology do so because they want to measure layer thicknesses very accurately,’ says Desjacques. ‘In addition, they are often very pleased with the fact that the technology can be used with all sorts of materials. Metal, glass, silicon – it’s all possible.’
Fields of application include medical systems, the semiconductor sector, aviation, the glass industry and electronics. As Verstappen says, ‘The technology lends itself very well to vacuum environments. Specifically, the optical pen is not affected by fumigation. And because you’re not adding any electronics, you also don’t have any heat effects, such as with other solutions. After all, the optical pen is a passive component.’
The right choice for you?
If you want to perform measurements on the micrometre scale, Verstappen thinks you should not consider chromatic confocal sensors. ‘There are other options for that. But if you’re talking about the sub-micron range, then the technology from Stil is the right choise.’
Get 100% control over your distance and thickness measurement. Read more directly in Stil’s presentation, or watch the recap in video.
This article was published in Mechatronica&Machinebouw nr.7 2018 and is written by Alexander Pil


